Node.js: A REST Web-API with Express.js and TypeScript
There is one Web-Application Framework, which has been strongly enforced with Node.js: Express.js. It has been inspired by the Sinatra-Framework, known of the Ruby world. It extends the Node.js Build-In modul http, so developing a modern web-app will be simplified:
- Comparable to the Microsoft Web-API (just better :))
- Communication with REST (HTTP) is norm
- Request/Response-Handling
- Routing
- View Templating
- Session Support
- Static Files Support
- Middleware
- e.g. functions, which are able to log between request and response (Logger etc.)
- and many more…
The installation
At first we need to create a new Node.js project with a TypeScript compiler configuration and the appropriated Visual Studio Code build and debugging configuration. Those steps have already been explained in detail in the following article:
Visual Studio Code: Node.js with TypeScript and Debugging
In addition to that, Express.js and the associated TypeScript declaration is needed. To include them, you just need to write following in the terminal within the project:
npm install express –save
npm install @types/express –save-dev
The first Express.js „Hello World“
We create a new index.ts file or replace the existing file with this code:
import express = require('express');
let app = express();

app.get('/', function (request, response) {
    response.send('Hello World');
});

app.listen(3000);
The code is very similar from the usual “Hello World” example for Node.js. The differences: Express.js creates a web server automatically in the background with the listen function. The query for REST is given explicitly, like in this example with get. Routing is then set with a string value. When the request is processed, an anonymous function is executed as usual, but no stream has to be explicitly terminated here. This is why Express.js takes care of itself automatically.
The GET function with parameter
A REST GET action is stored using the get function. Routing is defined by string and parameters are additionally marked with a colon and variable names. As the following example shows:
app.get('/api/sayhello/:name', (request, response) => {
    let name = request.params.name;

    if (!isNaN(name)) {
        response
            .status(400)
            .send('No string as name');
    } else {
        response.json({
            "message": name
        });
    }
});
In Visual Studio code, start the TypeScript compiler [ctrl] + [shift] + [b] if it is not already running. Next, execute the application with [F5].
Then type http://localhost:3000/api/sayhello/John in the browser. The Web service should now return the following JSON value:
{
    "message": "John"
}
The following return functions are possible with the Get function:
renderfor HTML content using View Enginesendfor text contentjsonfor JSON contentredirectfor forwarding
Queries
Ordinary query parameters can also be queried. These are located under request.query.PARAMETERNAME. Additional routing is not required.
app.get('/api/sayhello/', (request, response) => {
    let name = request.query.name;

    let result = {
        message: name
    };

    if (!isNaN(name)) {
        response
            .status(400)
            .send('No string as name');
    } else {
        response.json(result);
    }
});
Next, execute the application with [F5]. Then type http://localhost:3000/api/sayhello?name=NodeJS in the browser.
The post action
Provide a post action by a post function. In order to process regular Form-Submit POST requests, however, two additional packages are required:
npm install body-parser multer --save
These are relevant for parsing multipart/form-data and application/x-www-form-urlencoded. As a single-middleware, upload.array() is also included in the post function. Forms sent data are queried through request.body.VARIABLENAME.
import express = require('express');
let app = express();

// For POST-Support
let bodyParser = require('body-parser');
let multer = require('multer');
let upload = multer();

app.use(bodyParser.urlencoded({
    extended: true
}));

app.post('/api/sayHello', upload.array(), (request, response) => {
    let name = request.body.name;

    if (!isNaN(name)) {
        response
            .status(400)
            .send('No string as name');
    } else {
        console.log('Hello ' + name);
    }

    response.send('POST request to homepage');
});

app.listen(3000);
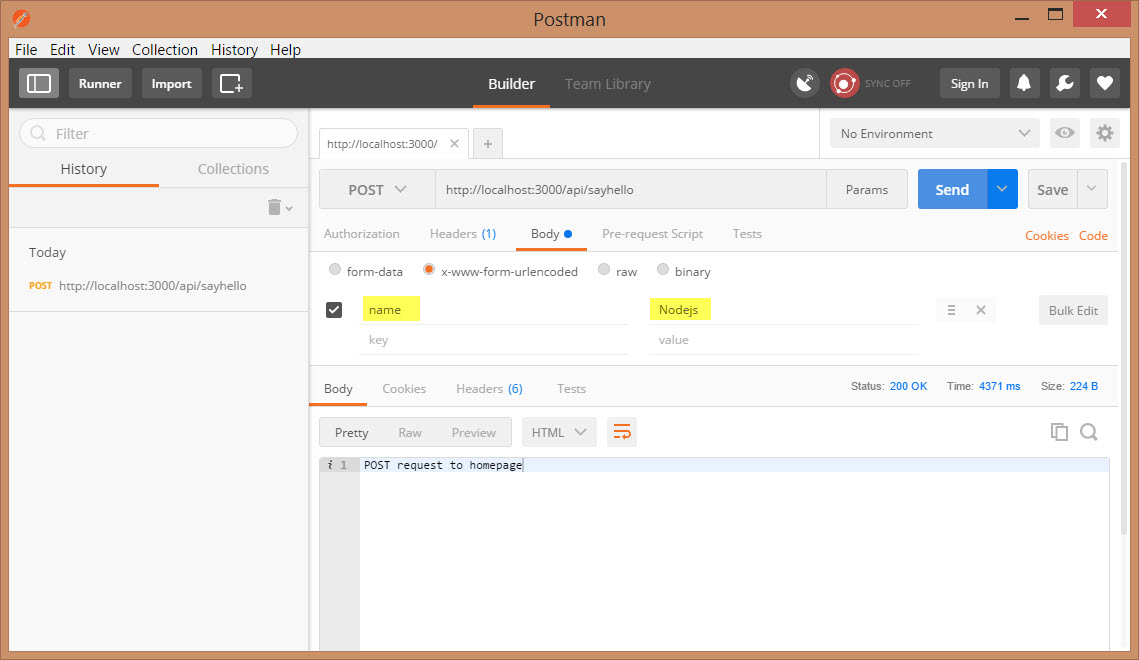
Tools such as Postman are suitable for testing. At Postman select “POST” first and type in the URL field http://localhost:3000/api/sayhello/. The following query comes directly below:

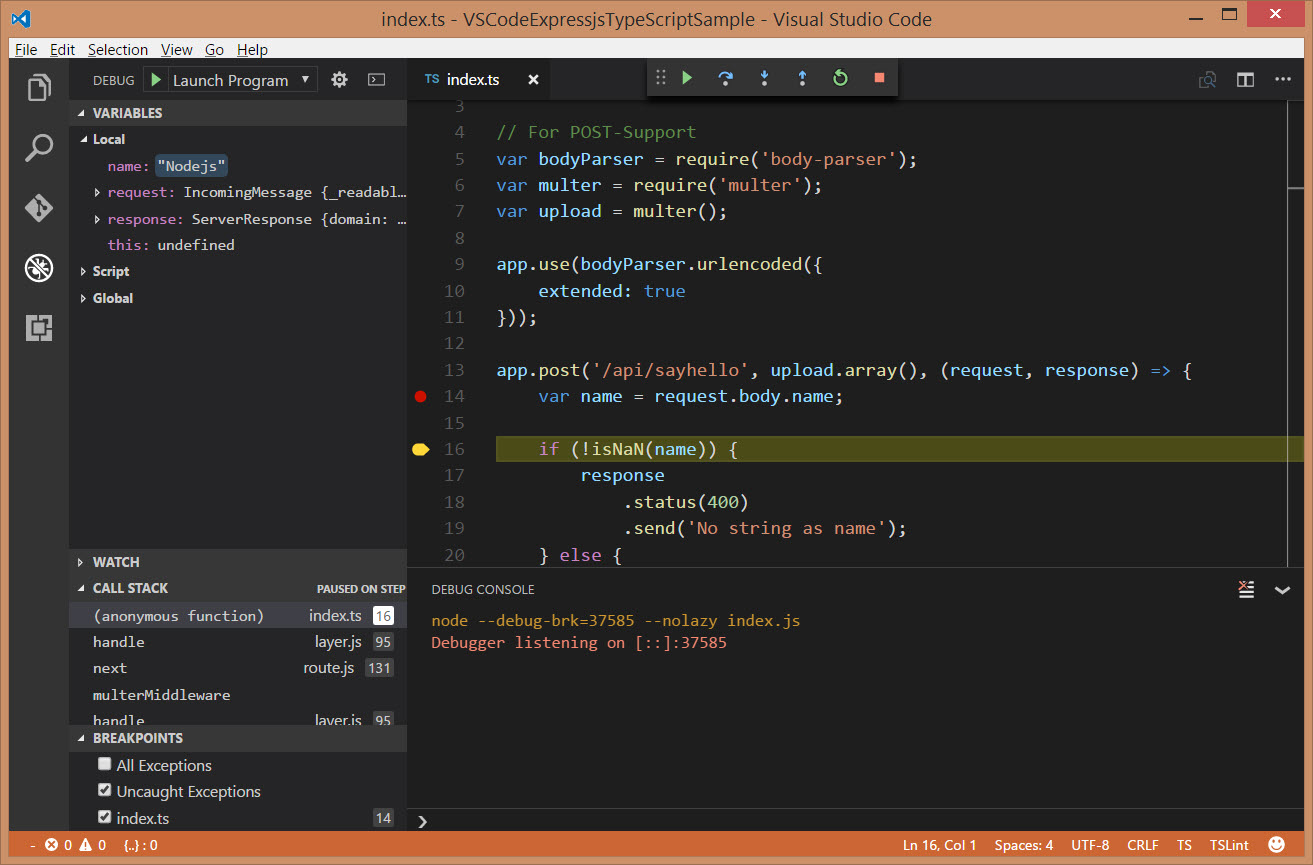
Now click on the next button and directly below the response data will appear. In Visual Studio Code you can debug the post request.

Conclusion
With Express.js you can quickly and easily provide web services and much more. In other articles I will go even deeper and further into this great Web Application Framework. The source code for the examples is based on GitHub:
How do you like Express.js? I’m looking forward to read your opinion in the comments.

